This blog post has been proof-read by Codex and some issues I had were solved with the help of ChatGPT.
Introduction
So I work in embedded software development, and there are pretty much two realms. There's the microcontroller (MCU) realm, where you write bare-metal code—usually as a superloop—and that's pretty much it, or you work with RTOSs such as FreeRTOS, NuttX, and Zephyr. Those are all fine and good, but the development environments and tooling available are limited. There are good libraries and debugging tools, but they are often not as fully fleshed out and can be conservative in their evolution. There's some push towards Zephyr and Rust, but it'll take a long time to displace the idea that you should only write C and run a superloop.
Then there's the second realm: Embedded Linux. I wanted to call it the MPU realm, for microprocessors (MPUs), so there would be a dichotomy between MCUs and MPUs. But MPU doesn't communicate the idea. You can have an MCU running Linux and doing whatever a superloop would do, although they answer different needs and often provide different advantages. But that's not the point of this blog post. I wanted to talk about what is available in the Embedded Linux realm and how we work with it.
In the Embedded Linux realm, we often hear about Yocto, which is a framework that helps us build embedded Linux images. I wanted to walk through their "Quick Build" documentation to see how well it works and maybe share some tricks that could help others.
So let's get started!
Compatible Linux Distribution & Build Host Packages
This step gives you access to the packages necessary to build a Yocto image. But I think that it is unnecessary. When starting a Yocto project, I would suggest reusing a Nix environment from Nix Community. Luckily, there is a Yocto environment that you can run with nix develop --no-write-lock-file github:nix-community/nix-environments#yocto to get a shell able to run Yocto commands.
If you only run this command, you will not have anything on your machine to reuse or share. This is why I encourage using a flake.nix file to capture this dev shell.
I understand that this requires Nix to be installed, but it is worth the trouble, in my honest opinion. What if somebody is not on Ubuntu, which is the default path suggested by the documentation? Otherwise, we would need a Docker image to build our Linux image. What happens when you want to debug or investigate deeply? You are encumbered by that abstraction. So I prefer a simple dev shell with Nix, which lets me have all the dependencies in one place without having to worry about them. Another thing with Docker is that the environment is not necessarily reproducible; I would feel silly trying to build a reproducible Linux image if I do not control the environment. From what I've been told, Docker images are normally just used to bootstrap, and then BitBake allows you to reuse the right dependencies. But would that still be different? With Nix, they are always going to be the same.
Anyway, I'm not trying to make it a debate, just sharing my thoughts. Yes, you need to install Nix. If you are on macOS or Linux, it is pretty easy: simply follow the steps here: https://nixos.org/download/, and you should be good to go.
Now to have something you can reuse first:
- Write the following code in a file named
flake.nixat the root of your project.
  {
    inputs.nix-environments.url = "github:nix-community/nix-environments";

    outputs = { self, nix-environments }: let
      system = "x86_64-linux";
    in {
      devShell.${system} = nix-environments.devShells.${system}.yocto;
    };
}- Execute
nix flake lock. This fetches the inputs that Nix uses to pull the packages. - Execute
nix develop, which will build or download the dependencies and then drop your shell into a dev-shell environment that has access to them.
And that's it for this part. It is a bit awkward because it does not make it explicit that you are in a dev shell.
Use Git to clone bitbake-setup
One important thing is that you are in a bash shell, which I find a bit regrettable, but maybe there is no better way.
This one is pretty straightforward, and I do not really have anything to add.
- Execute
git clone https://git.openembedded.org/bitbake - Execute
./bitbake/bin/bitbake-setup init. This configures the Yocto project.
They give you the option to change the top directory, so the place where you build and work on the different recipes can be somewhere else. It might be useful for some, but I do not think it should be on the "Quick Build" page.
-
Now you will get a prompt asking questions about what you want your Linux image to be.
- If you choose
poky, it is like an example distribution. You are not supposed to build onto that. - I would suggest choosing the stable release, but I do not think this is especially clear. Just Google it, and you should be able to figure it out.
- If you choose
Build Your Image
Now that we are getting into the meat of the tutorial, I think it is imperative to configure a couple of things first. You need to find the build directory of your image. Normally, it should be somewhere like this: /<project directory>/bitbake-builds/<name of the image config>/build/conf/. For me, it looks like this: /yocto/bitbake-builds/poky-tiny-wrynose/build/conf/, where poky-tiny-wrynose is the configuration for my image.
Inside that /conf/ directory, you need to find local.conf. This is where you configure the build options for your image.
If you do not configure these build options, your system may lock up because too much compilation is happening at the same time.
I cannot stress this enough, and I think the original tutorial does a very poor job of explaining it. Otherwise, users will hit that wall and may not understand what is happening. I find this, like the rest of Yocto, to be a bit lazy. Anyway, I do not want this to be a rant about Yocto.
So what are the important configuration options to add to our local.conf? Great question! Here they are:
  BB_NUMBER_THREADS = "${@str(max(1, oe.utils.cpu_count() - 2))}"
  BB_NUMBER_PARSE_THREADS = "${BB_NUMBER_THREADS}"

  PARALLEL_MAKE = "-j ${BB_NUMBER_THREADS}"
  PARALLEL_MAKEINST = "-j ${BB_NUMBER_THREADS}"

  BB_PRESSURE_MAX_MEMORY = 150000
We will go line by line and explain what each does.
-
BB_NUMBER_THREADS = "${@str(max(1, oe.utils.cpu_count() - 2))}"- This is a little trick that I think should be the default. The idea is to limit the number of threads that BitBake will create to either one or the number of cores in your machine minus two. That way, you will always have enough CPU to at least kill the image build. Nix also does not do something like this, which does not seem like very good UX design to me. TODO VALIDATE
-
BB_NUMBER_PARSE_THREADS = "${BB_NUMBER_THREADS}"- This is similar to the previous one; it is just that BitBake has a parser for the recipes, so this is the number of threads for those. TODO VALIDATE
-
PARALLEL_MAKE = "-j ${BB_NUMBER_THREADS}"&PARALLEL_MAKEINST = "-j ${BB_NUMBER_THREADS}"- These are configuration options for when recipes call
make, because that is basically what is happening under the hood. BitBake parses the recipes and then tries to orchestrate and execute them. So whenever you call a build command that uses multiple cores, you need to add a parameter here to tell it not to use too many.
- These are configuration options for when recipes call
-
BB_PRESSURE_MAX_MEMORY = 150000- This is a weird one, and you might have to play with it. It is based on a "psi" unit that the Linux kernel defines. It is a weird one.
And if I am honest, I am a little pissed about the fact that there is no limit for memory usage when building with Yocto. To me, that is not super nice. I am thinking more and more that we need to change the documentation. I am not too sure how, though. It is probably on their website, but that is another discussion.
If you want more information, you can visit this page, where these are explained: https://docs.yoctoproject.org/next/dev-manual/limiting-resources.html
Then you can start the build. You can use the command bitbake core-image-minimal. In the tutorial, they use core-image-sato, and Sato is a more complete environment. More often than not, it might not be necessary.
And then you should see the build start:
~/Code/personal/linux/yocto/bitbake-builds/poky-tiny-wrynose/build >  bitbake core-
image-minimal
WARNING: /nix/store/70q2qd4437v7347yph8mnxw8b88rkd3g-nixvars.conf:3 has a lack of w
hitespace around the assignment: 'export NIX_DONT_SET_RPATH= "1"'
WARNING: Host distribution "nixos-26.05" has not been validated with this version o
f the build system; you may possibly experience unexpected failures. It is recommen
ded that you use a tested distribution.
Loading cache: 100% |###############################################| Time: 0:00:00
Loaded 0 entries from dependency cache.
Parsing recipes: 100% |#############################################| Time: 0:00:17
Parsing of 950 .bb files complete (0 cached, 950 parsed). 1967 targets, 201 skipped
, 0 masked, 0 errors.
NOTE: Resolving any missing task queue dependencies

Build Configuration:
BB_VERSION           = "2.18.0"
BUILD_SYS            = "x86_64-linux"
NATIVELSBSTRING      = "nixos-26.05"
TARGET_SYS           = "x86_64-poky-linux-musl"
MACHINE              = "qemux86-64"
SDKMACHINE           = "x86_64"
DISTRO               = "poky-tiny"
DISTRO_VERSION       = "6.0.2"
TUNE_FEATURES        = "m64 x86-64-v3"
meta                 = "wrynose:5d1aa5c806c061a2994f4decb59016610f093213"
meta-yocto-bsp
meta-poky            = "wrynose:24c24cef5d1523fefe43a3e3d34667b37ae551f3"

Initialising tasks: 100% |##########################################| Time: 0:00:02
Checking sstate mirror object availability: 100% |##################| Time: 0:00:12
Sstate summary: Wanted 1764 Local 1339 Mirrors 421 Missed 4 Current 0 (99% match, 0
% complete)
NOTE: Executing Tasks
WARNING: /nix/store/70q2qd4437v7347yph8mnxw8b88rkd3g-nixvars.conf:3 has a lack of w
hitespace around the assignment: 'export NIX_DONT_SET_RPATH= "1"'
WARNING: /nix/store/70q2qd4437v7347yph8mnxw8b88rkd3g-nixvars.conf:3 has a lack of w
hitespace around the assignment: 'export NIX_DONT_SET_RPATH= "1"'
NOTE: Tasks Summary: Attempted 3312 tasks of which 3299 didn't need to be rerun and
 all succeeded.

Summary: There were 4 WARNING messages.
~/Code/personal/linux/yocto/bitbake-builds/poky-tiny-wrynose/build >
Run your image
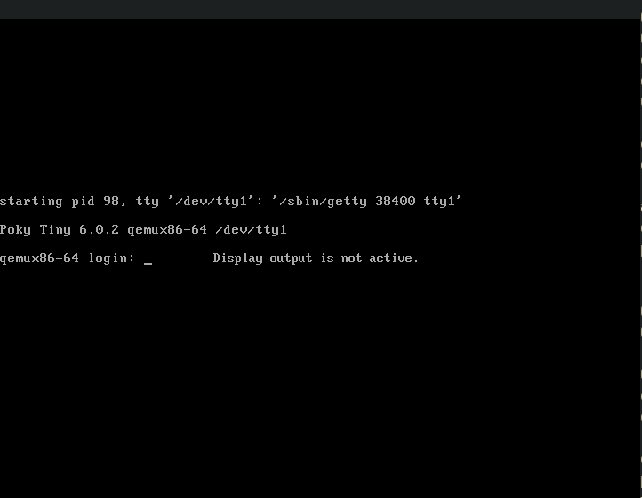
Now we can try to run our image with runqemu snapshot slirp. We need the slirp option to tell QEMU to run with the user-space networking interface.
And then you should see something like this:
Conclusion
So I am not a huge fan of this tutorial. There is a bunch of information missing and some glaring pitfalls. Hopefully this is more helpful; maybe at some point, I will send a patch.
I will cover the rest of the tutorial, regarding adding and creating layers, in another blog post, just so it is easier to digest. Hopefully this was a bit useful.